


The Project
ParkingTix is an app that allows users to pay and dispute their parking tickets without going in to court. ParkingTix for web was the second project assigned to me by my instructors as part of the Google UX design professional certificate program on Coursera. The goal of the project was to create a web version of the mobile app that was compatible with multiple kinds of devices. The project took 9 days from its inception to its completion.
ParkingTix for web was developed as a in 5 phases according to the methodology provided by the Google team of instructors. The 5 phases of a UX design project are empathize, define, ideate, prototype, and test.
Empathize
The first phase of the UX design process is empathize. In this phase, a UX designer researches users to understand their needs. This often involves user interviews, user personas, user stories, and user journey maps. These tools help the designer get to know the users, which is the first step in creating a product.1
User Interviews
Most UX design projects involve the step of conducting user interviews so the designers can get to know the client. This helps designers produce a high-quality product that addresses real user needs. ParkingTix for web was a project produced for an assignment. As a student I did not have access to the resources to conduct a significant amount of user interviews. It is common for UX design projects to develop as a response to a user need uncovered by research. In the case of ParkingTix for web the project was developed as a response to a prompt provided by my instructors at Google. ParkingTix for web was based on the original ParkingTix app design project and shared a common function and target audience. I did not need to conduct user interviews for this particular project.
User Personas
A user persona is a fictional profile based on research, reflecting a typical user’s needs, goals, and behaviors. It includes a name, photo, demographics, and a personality quote, helping UX designers keep the user’s perspective central to their work.2
ParkingTix for web is a continuation of the original ParkingTix app design project. The product is intended to serve the same users and provide the same functionality. This means I was able to use the research I had conducted previously as a resource for this second project. In this project I used the same user personas I developed previously for the ParkingTix app as the basis for my new design.


User Stories
User stories are brief narratives about potential users and their challenges, based on user personas. Each story focuses on a specific user persona and highlights key problems they face, serving as a starting point for exploring solutions.3
In this project I used the user stories I developed for my previous project, the ParkingTix app.
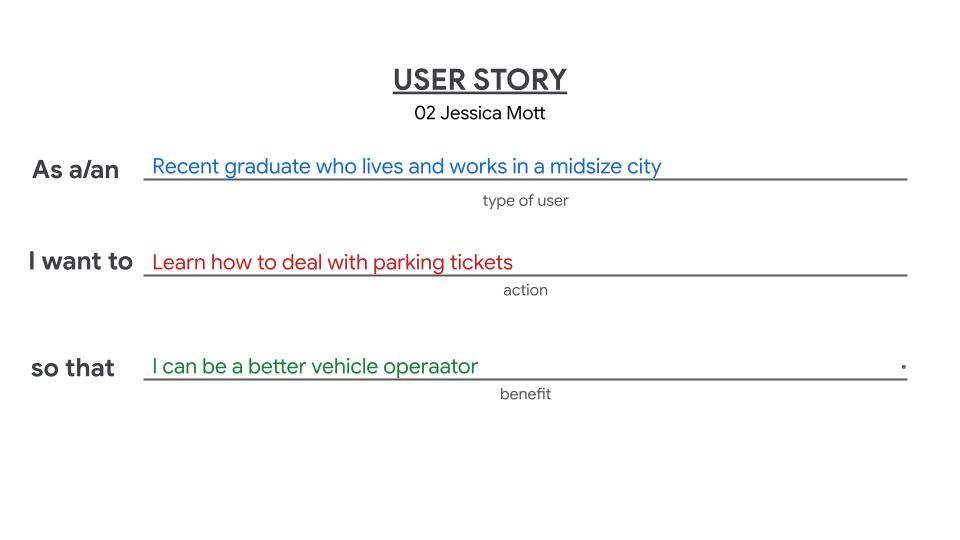
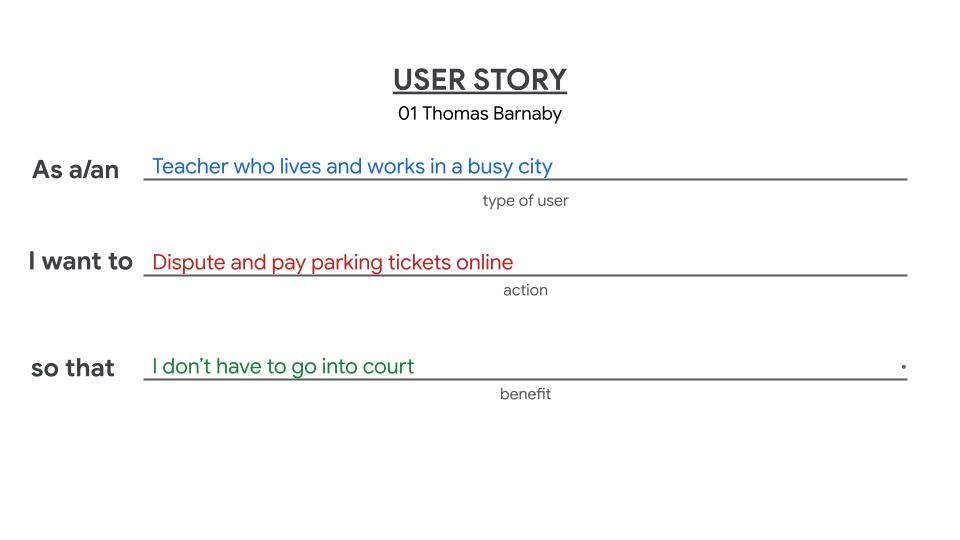
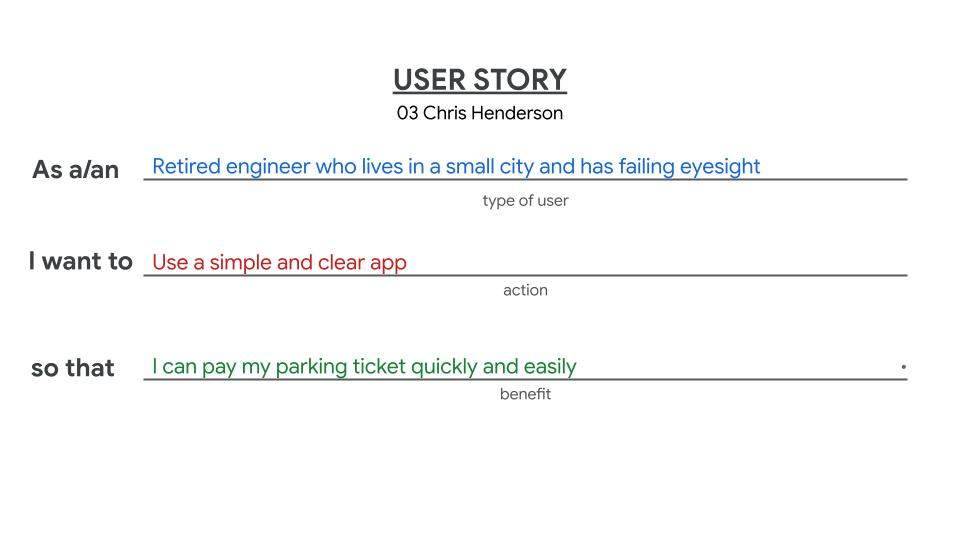
My Google instructors provided the following formula for user stories:
“As a/an [type of user] I want to [action] so that [benefit].”
I used this formula to develop user stories for each of my three user personas, Thomas Barnaby, Jessica Mott, and Chris Henderson.
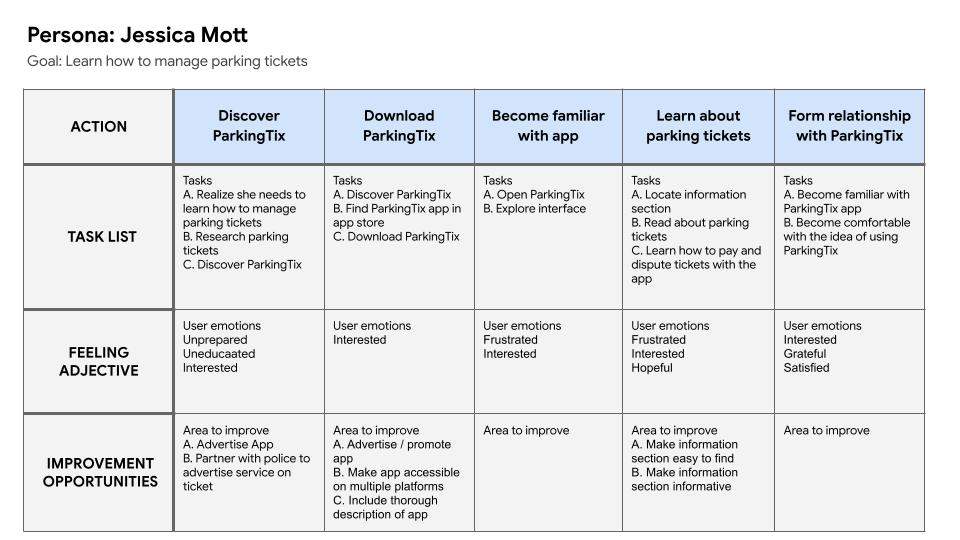
User Journey Maps
User journey maps visually depict a user’s problem and the steps they take to solve it. The journey map is divided into squares, each describing the user’s situation, feelings, and actions.4
For ParkingTix for web I used the same user journey maps that I created for the ParkingTix app.


Define
The second phase of the UX design process, called define, focuses on understanding users’ problems and selecting one to solve. In this phase, the designer develops problem statements and goal statements to clarify the problem and the desired outcome.5
Problem Statements
In the define phase of UX design designers write problem statements that briefly describe the issues users face. The goal is to get a clear idea of the user’s problem so the designer can address it in the product or service. Problem statements are based on research and are created for each user persona developed in the empathize phase.6
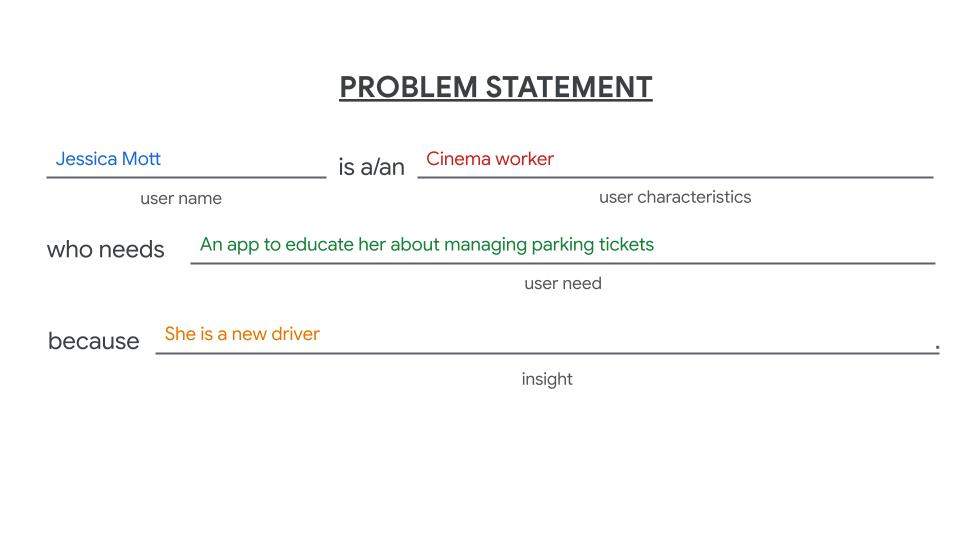
Problem statements usually follow the following format:
“[User name] is a/an [user characteristics] who needs [user need] because [insight].”
For ParkingTix for web I used the problem statements I made for the ParkingTix app.


Goal Statement
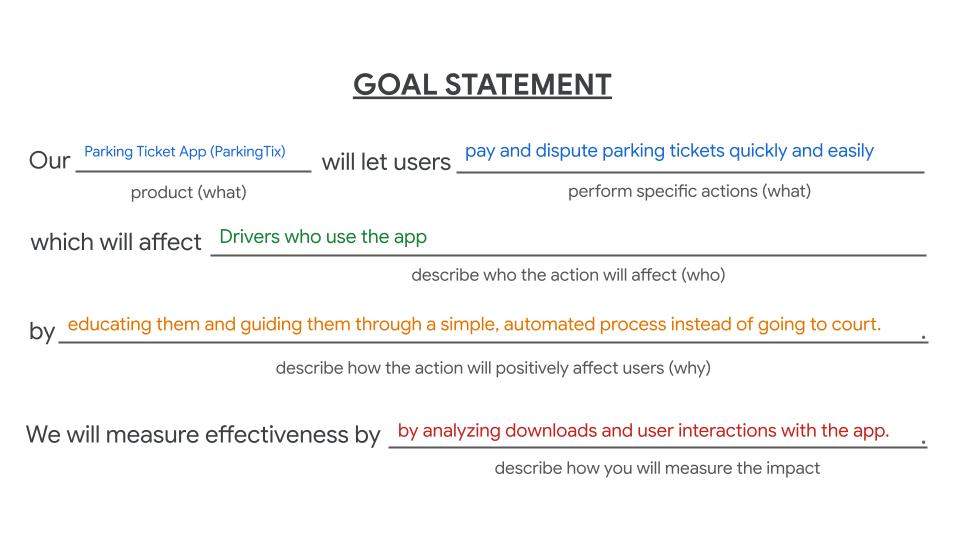
A goal statement is a brief description of the proposed solution to a user’s problem, typically addressing the issues outlined in the problem statement. The solution is usually the product or service being developed by the UX designer and their team.7
The goal statement is usually written according to the following formula:
“Our [product] will let users [perform specific actions] which will affect [describe who the action will affect]. We will measure effectiveness by [describe how you will measure the impact.]”
In this project I used the goal statement generated for my previous project, the ParkingTix mobile app.
Ideate
The third phase of the UX design process, ideate, focuses on brainstorming. During this phase the UX designer generates as many design solutions as possible to address the user’s problems, using techniques like rapid sketching and storyboarding.8
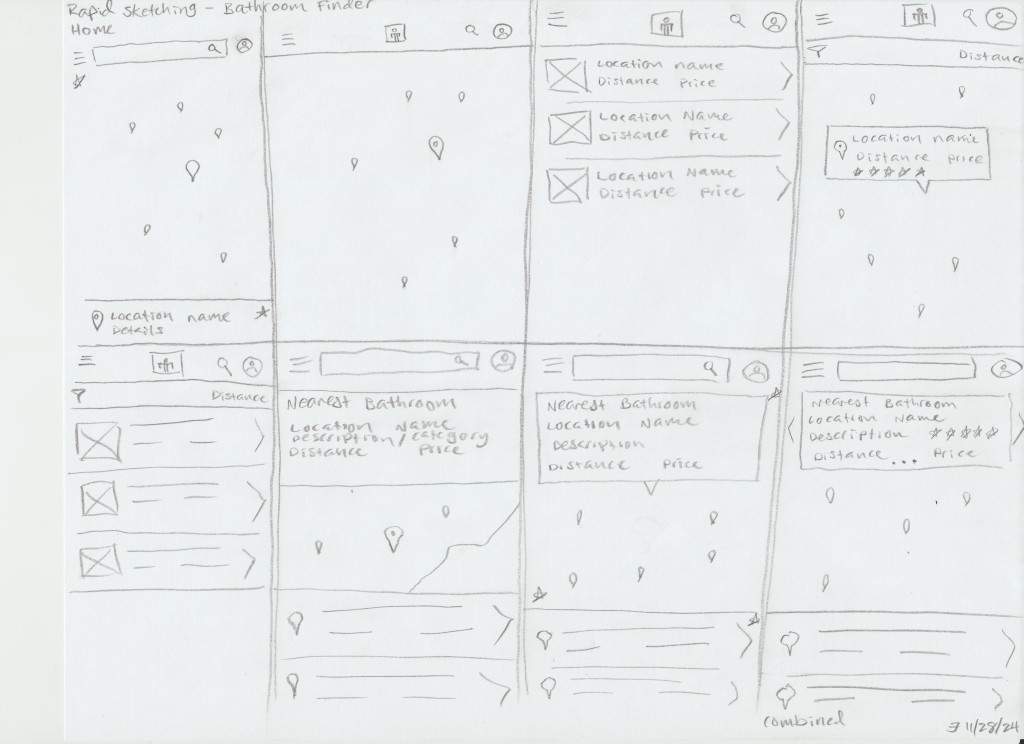
Rapid Sketching
Rapid sketching is an exercise where the UX designer quickly sketches multiple design solutions. One method, called “Crazy Eights,” involves dividing a sheet of paper into eight sections and drawing eight design ideas in eight minutes.9
I produced sketches for the web version of ParkingTix as part of this design project.
Storyboards
Storyboarding is an exercise where the designer visualizes how a user interacts with their product or service, similar to a comic strip. Storyboards can be wide shots, focusing on the broader context, or close-ups, highlighting the product’s details and functionality.10
I did not produce storyboards for the ParkingTix for web project. For the storyboards produced for the ParkingTix app see the other project.
Prototype
The prototype phase is the fourth of the five phases in the UX design process. During this phase, the UX designer creates key deliverables such as wireframes, mockups, and prototypes. These tasks are central to the UX design process, turning concepts into visual and interactive designs for testing and refinement.11
Wireframes
Wireframing is the first task in the prototype phase, where the UX designer creates simple images to represent the basic look and feel of the product. The wireframe acts as a rough draft of the app or website. UX designers often create both paper and digital versions of their wireframes.12
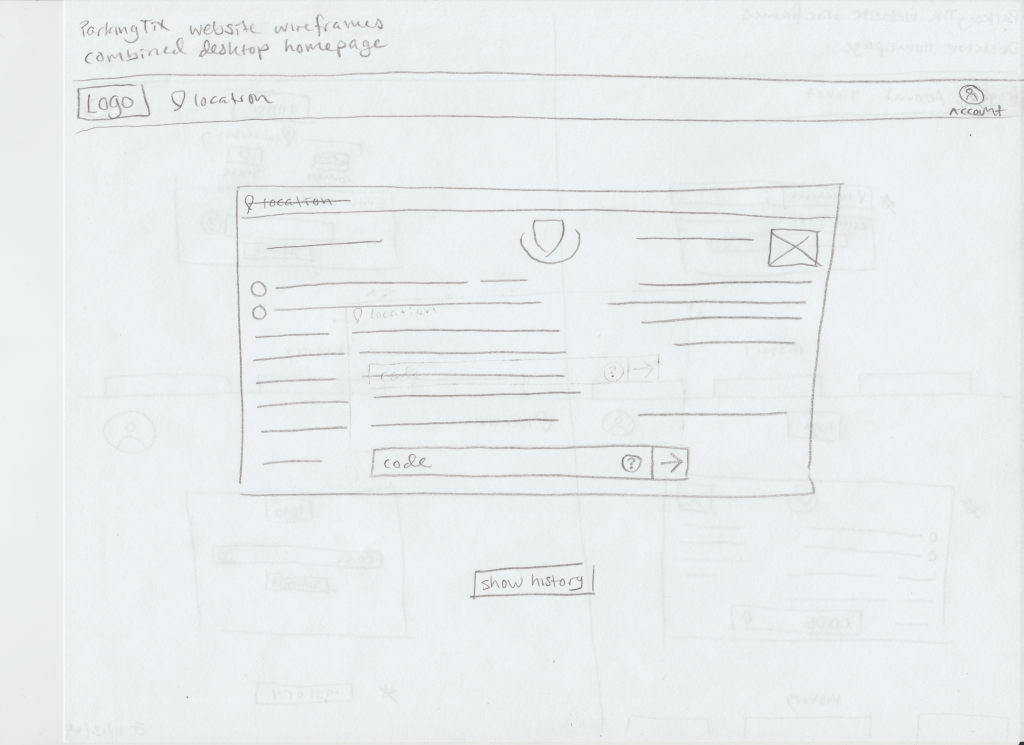
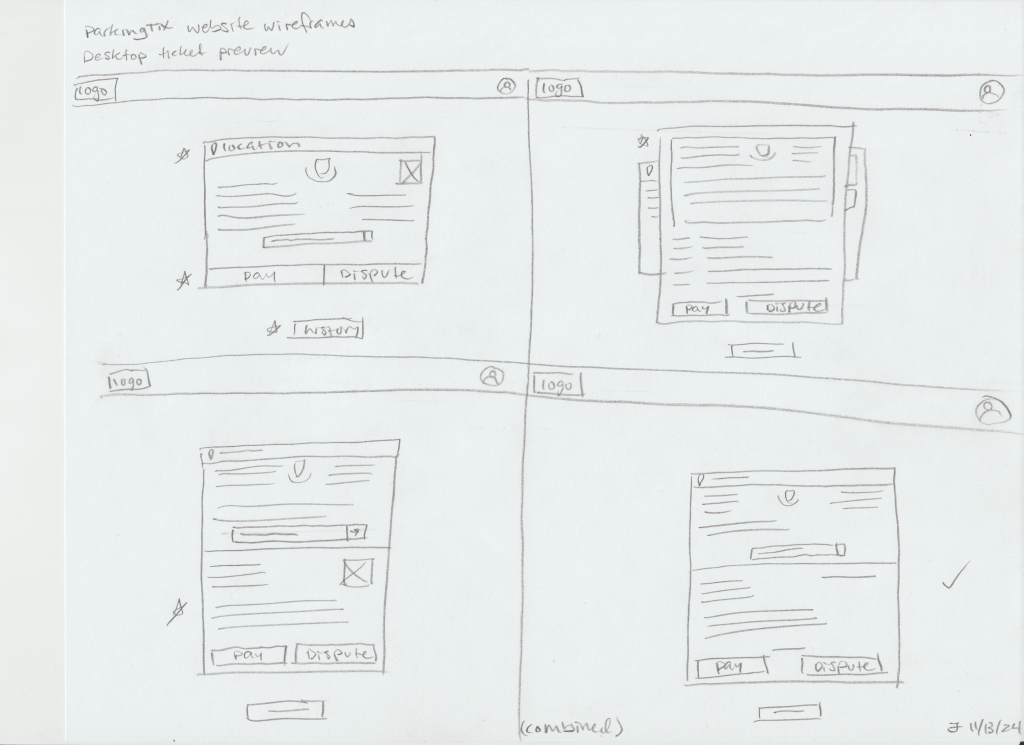
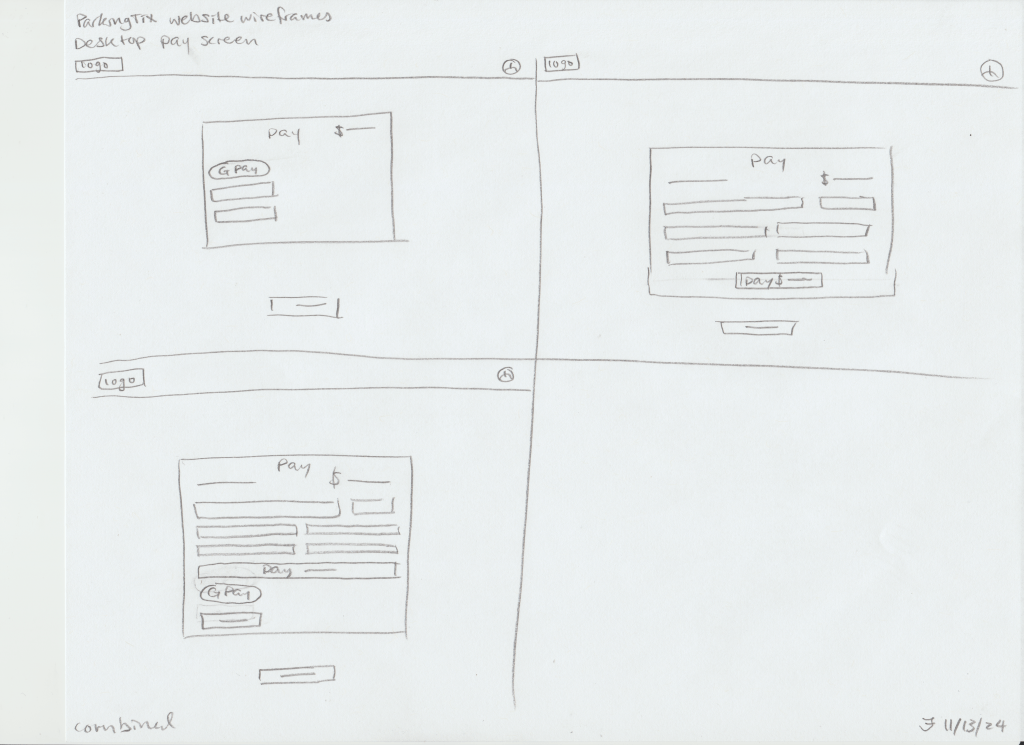
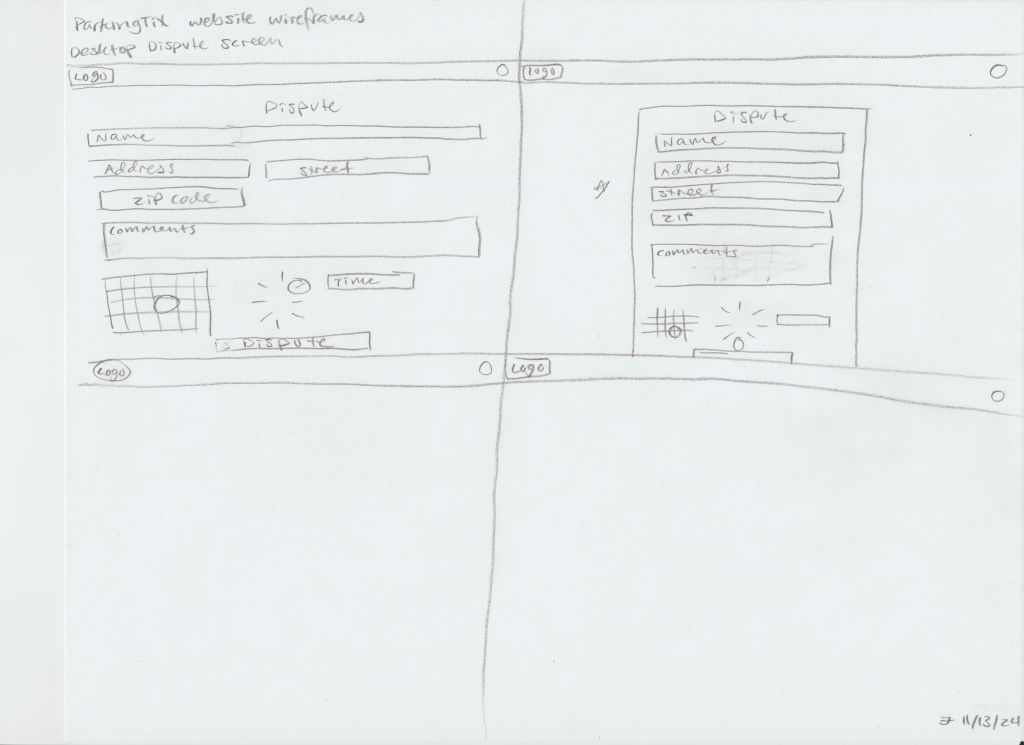
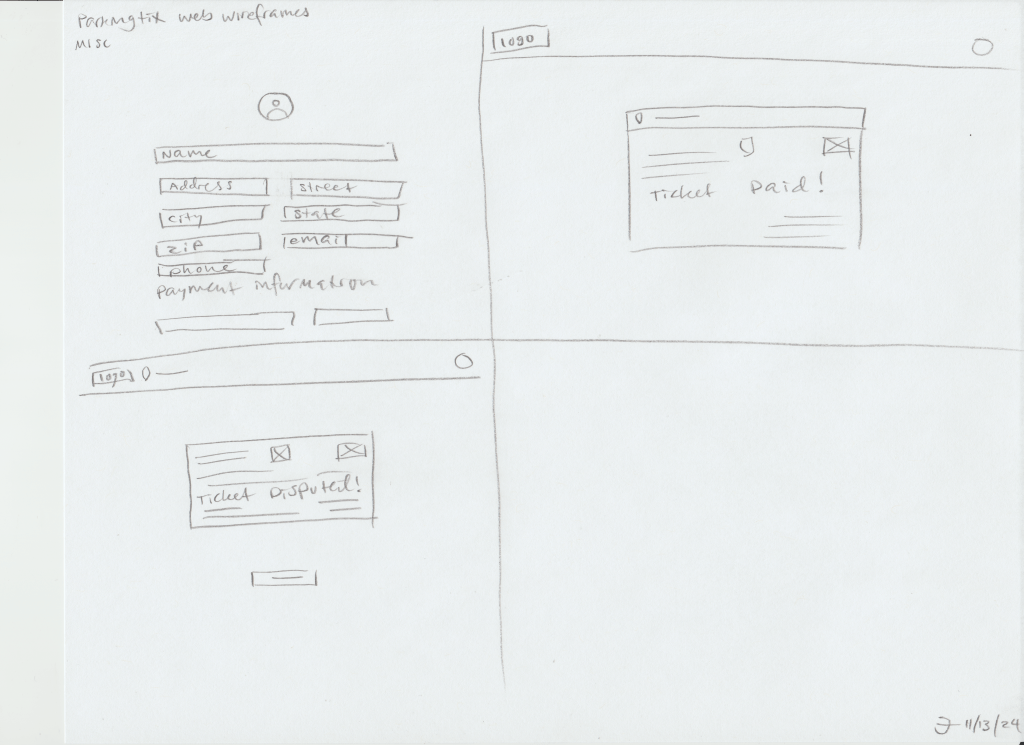
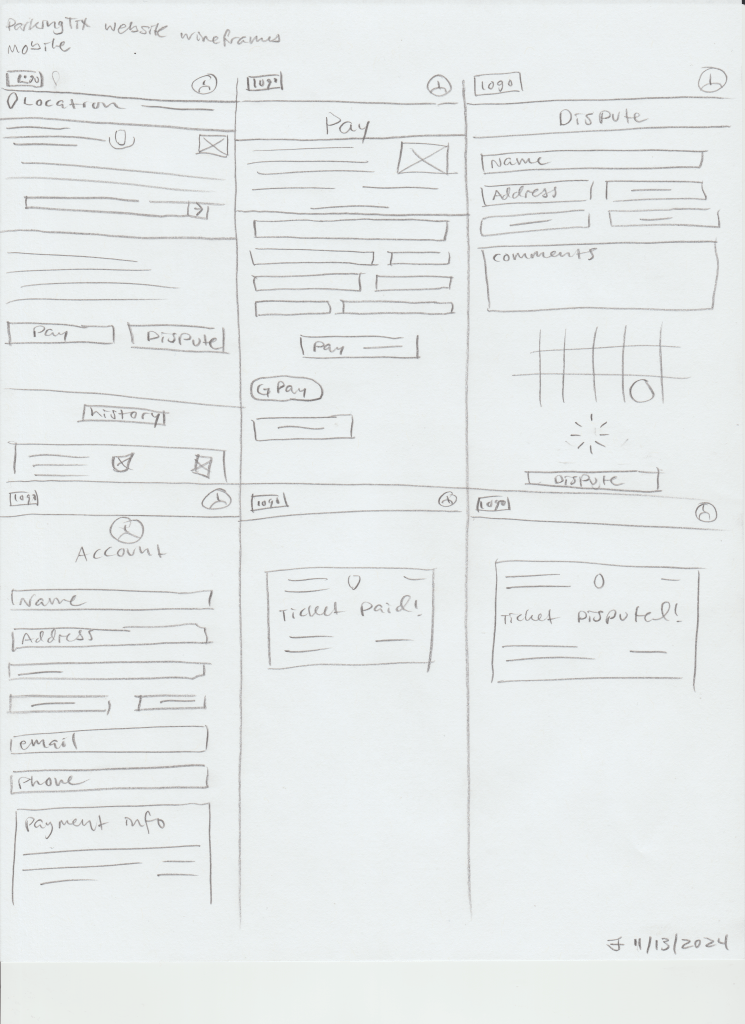
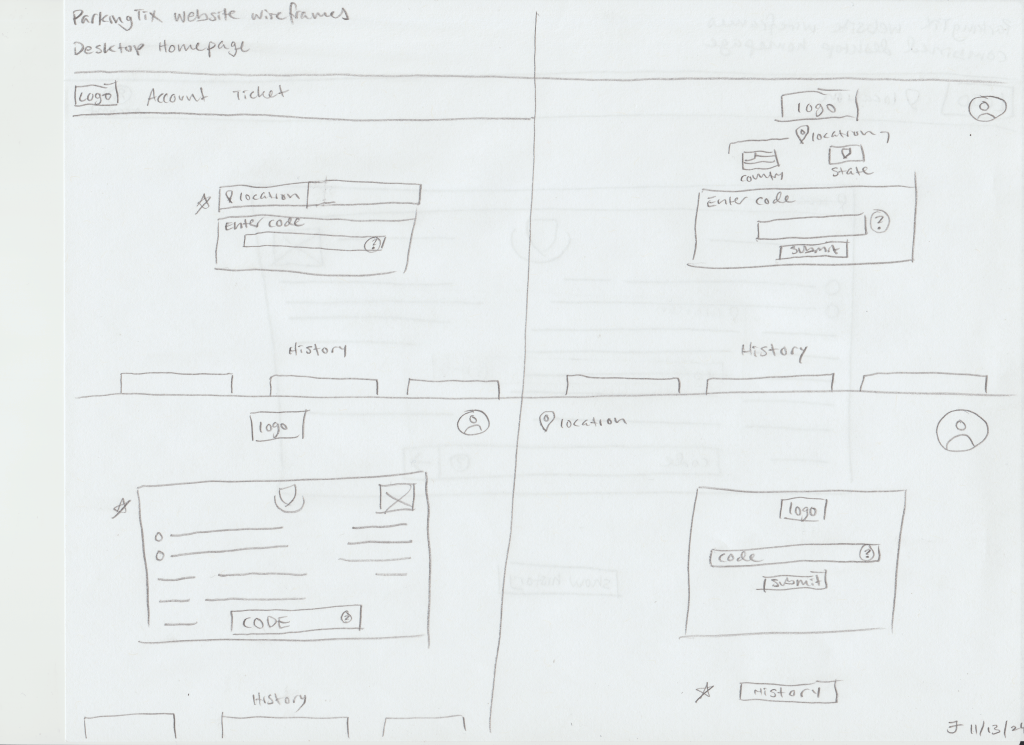
Paper Wireframes
UX designers often start with paper wireframes because they are inexpensive, quick to create, and easy to modify. With just an eraser, designers can quickly adjust the design, making paper wireframes an effective tool in the process.13
I created paper wireframes for the web version of ParkingTix.
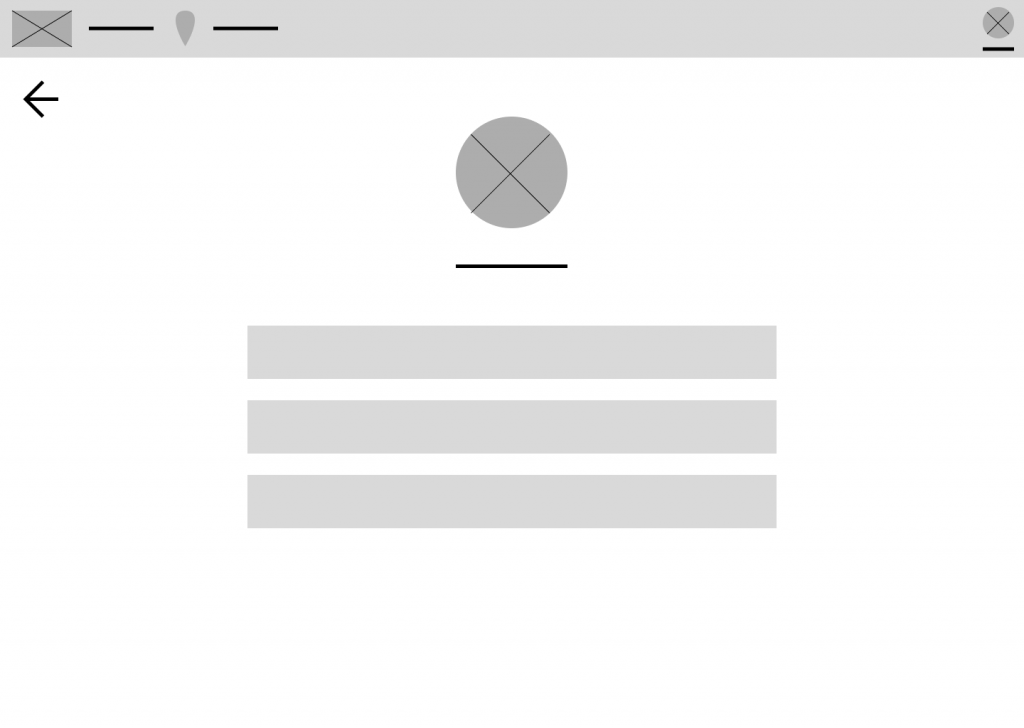
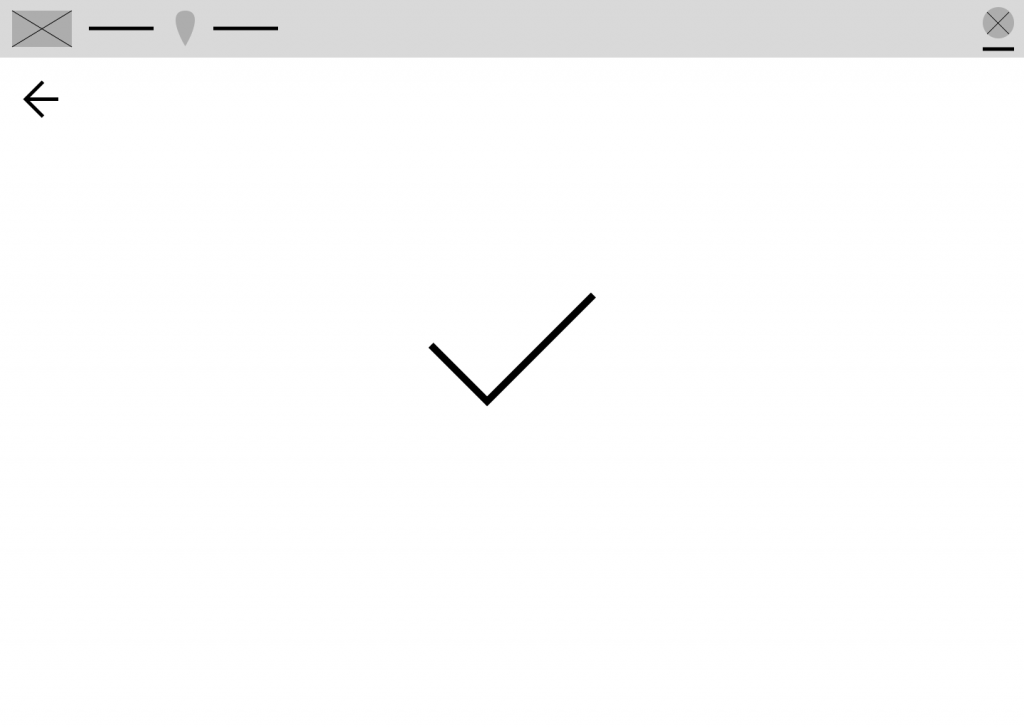
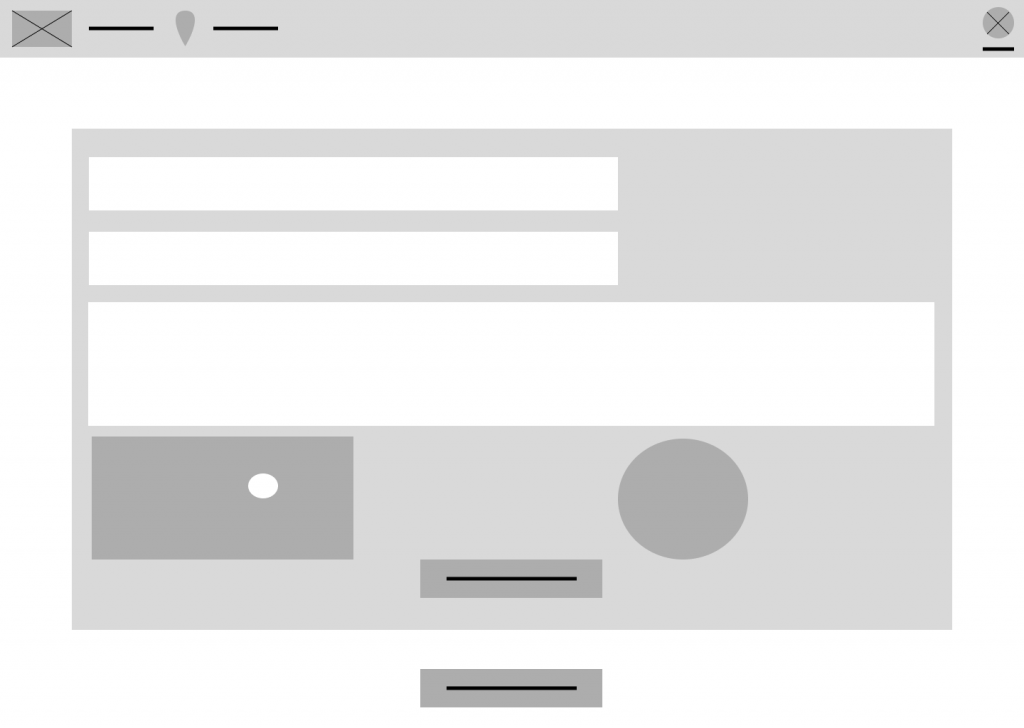
Digital Wireframes
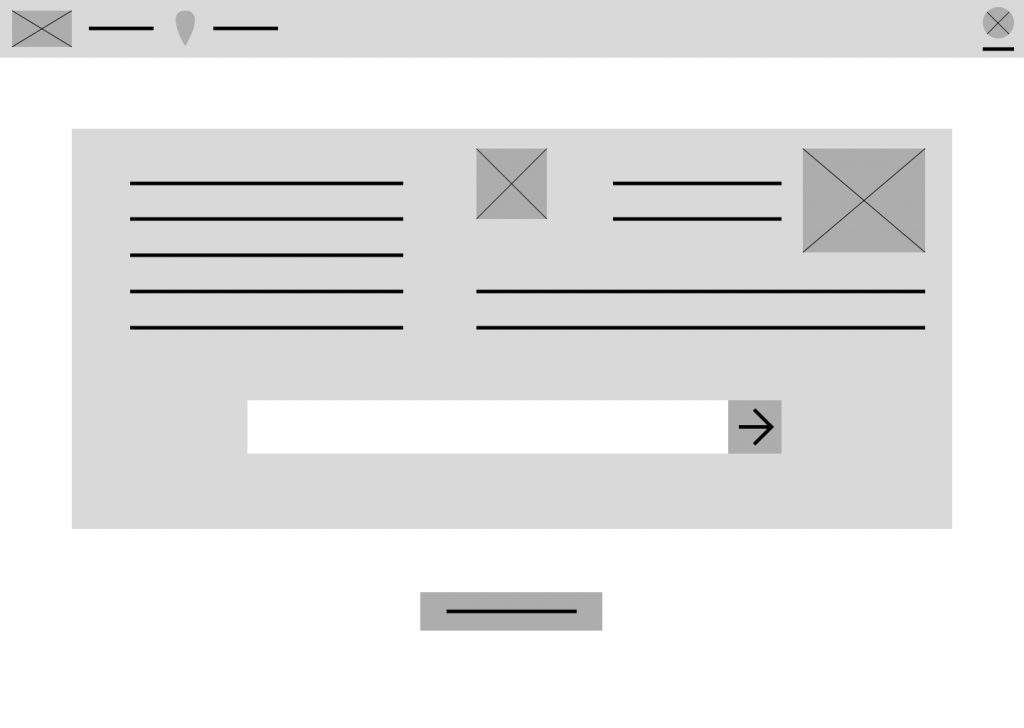
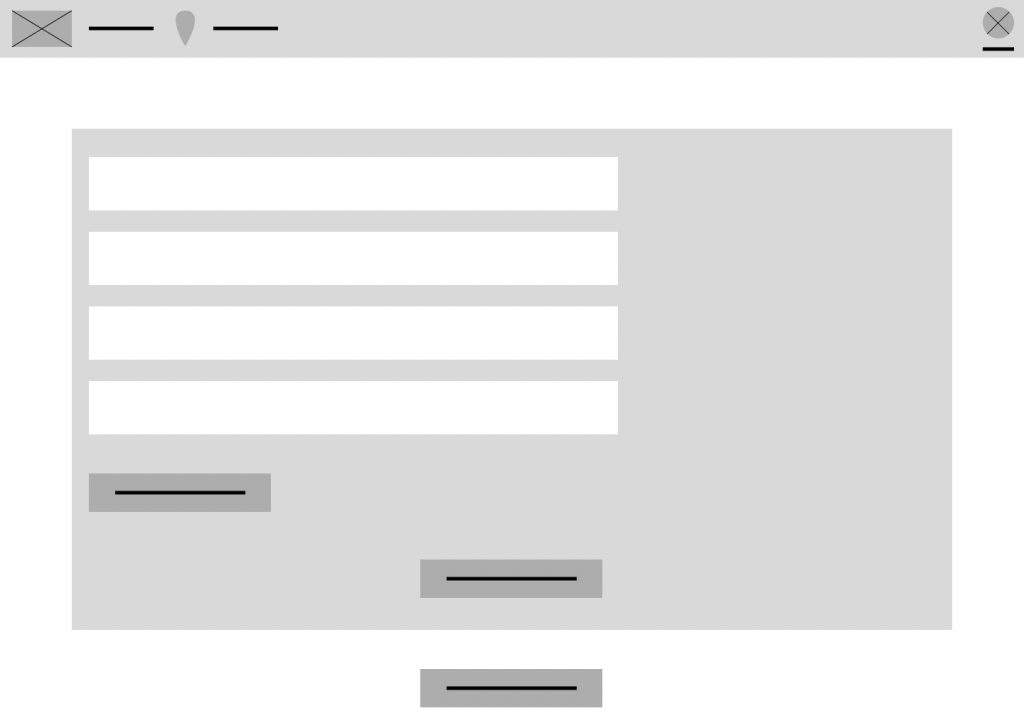
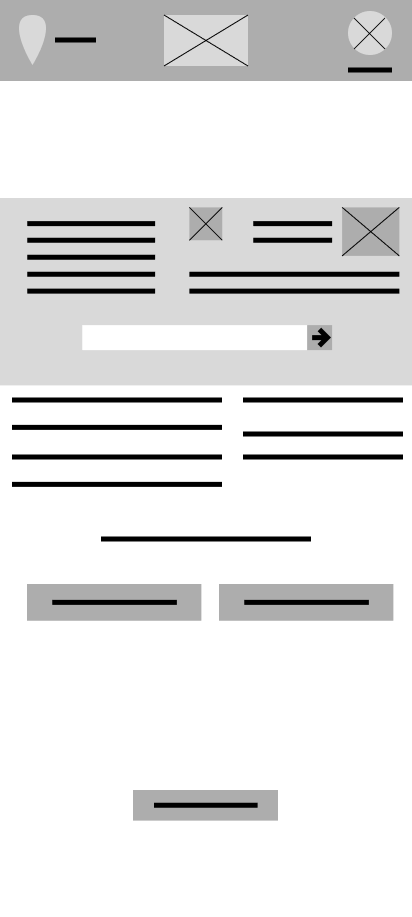
After creating paper wireframes, the UX designer moves to digital wireframes, which are based on the earlier sketches. These wireframes use simple shapes in design software like Figma or Adobe XD to provide a clearer idea of the final look. Digital wireframes also serve as a foundation for the next step in the design process. I created my digital wireframes in Figma.14


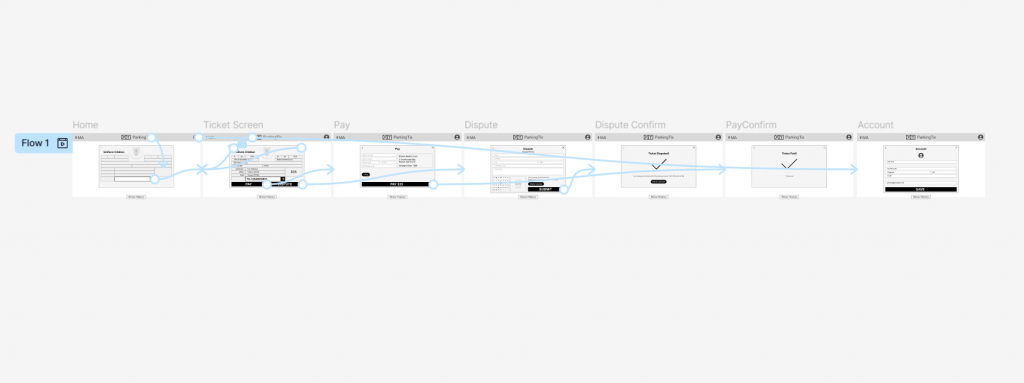
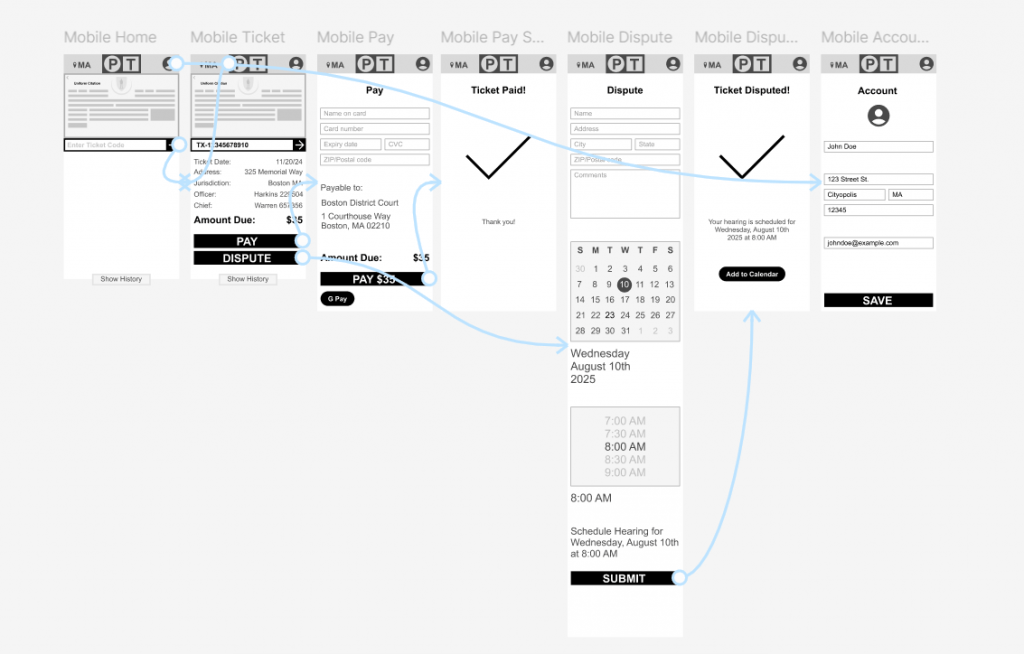
Lo-Fi Prototypes
After creating digital wireframes I built a prototype, which is an interactive model of the app or website. Prototypes are made from wireframes or mockups with clickable elements that link different screens. While it’s possible to make prototypes on paper, they’re usually created using design software like Figma.15
A “lo-fi” (low-fidelity) prototype is a basic version that shows the core functionality without focusing on detailed design elements like fonts, colors, or images. I built my lo-fi prototype in Figma.16
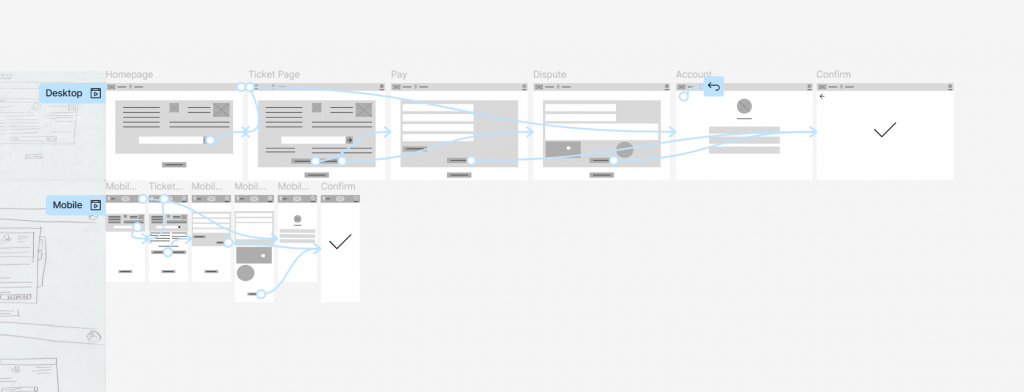
You can view my low-fidelity prototype for ParkingTix for web here.
Mockups
The next step in the prototype phase is creating mockups, which are detailed, high-fidelity designs of an app or website. Unlike wireframes, mockups closely resemble the final design. Mockups are not interactive. They are used to create high-fidelity prototypes.17


Hi-Fi Prototypes
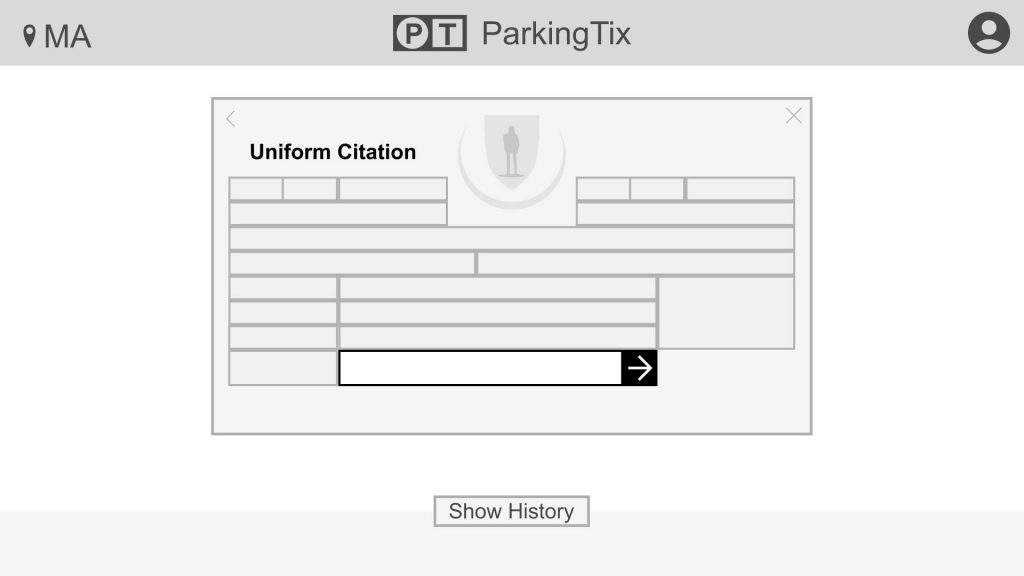
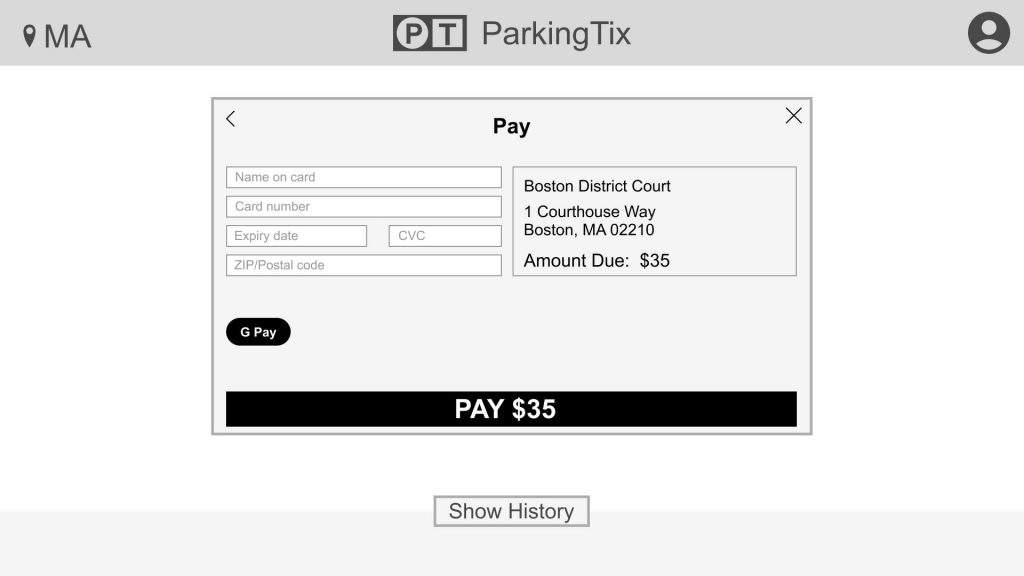
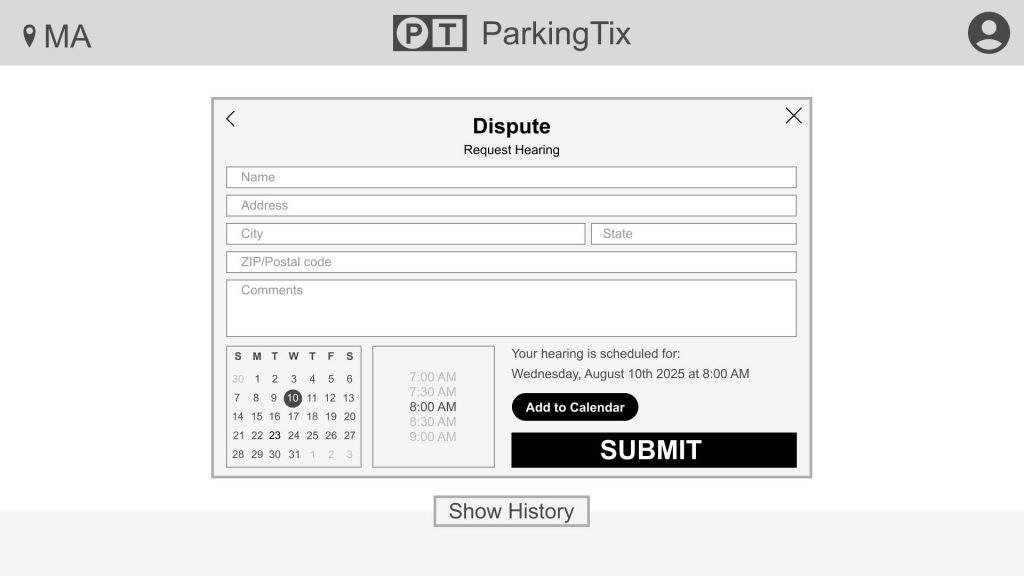
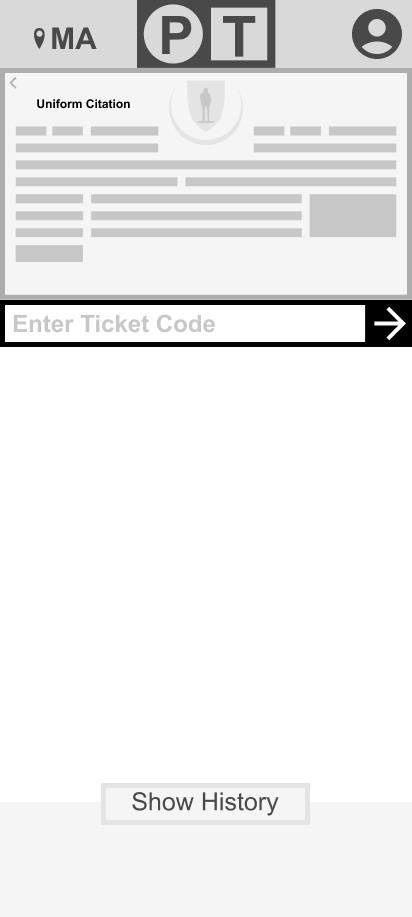
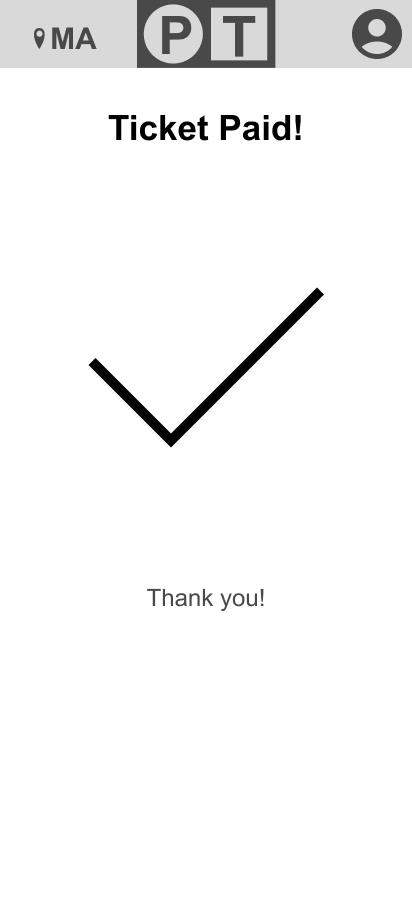
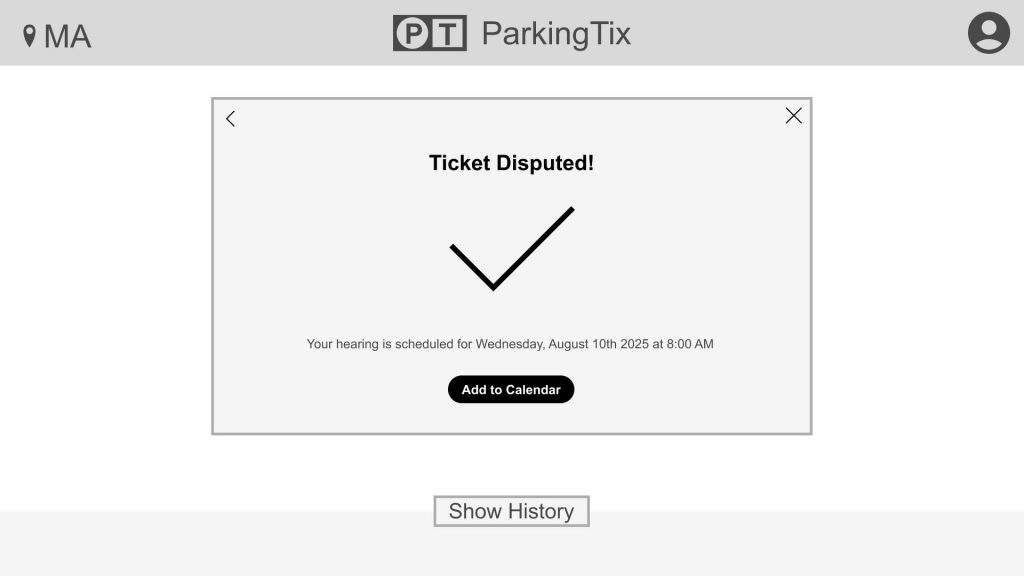
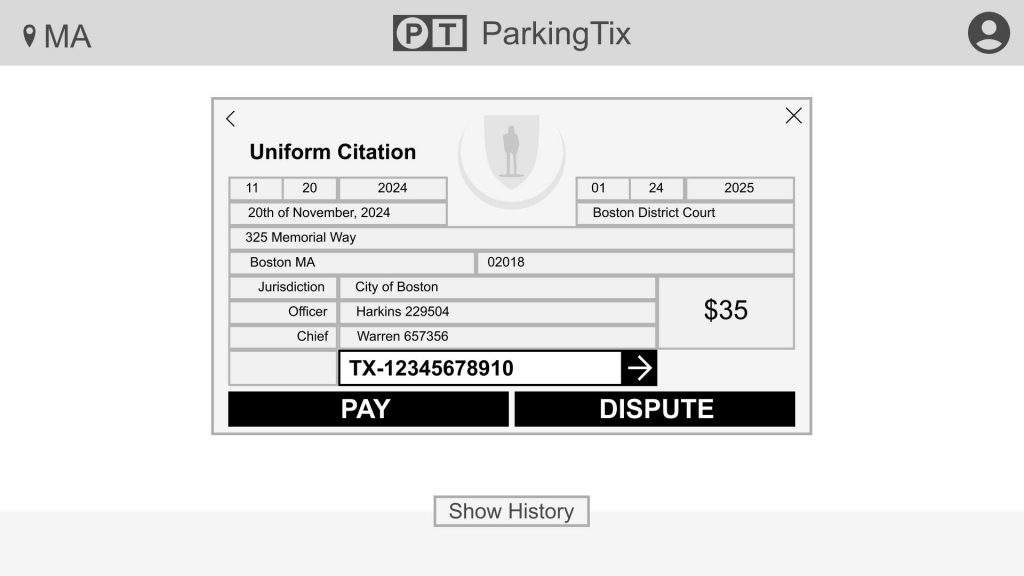
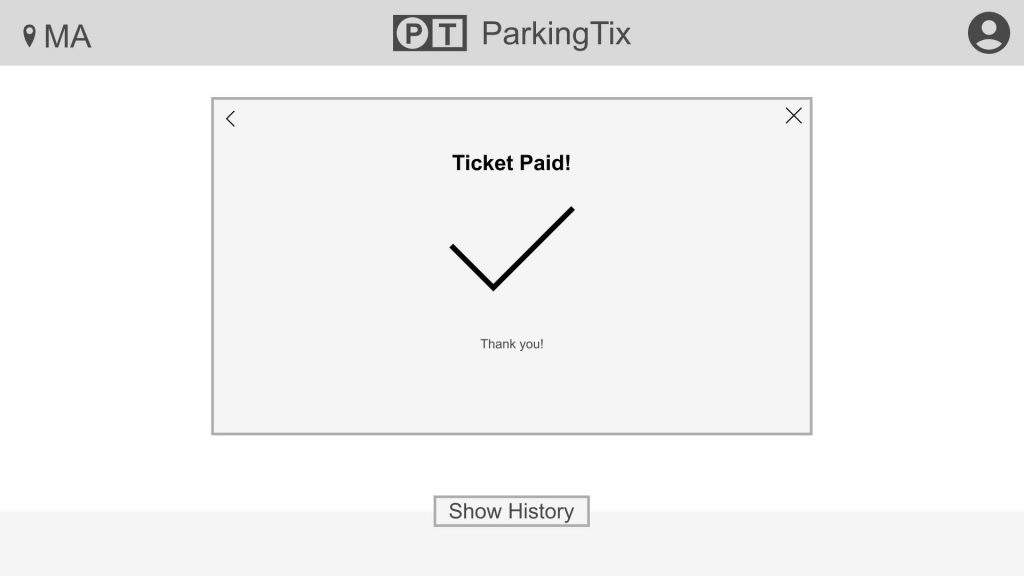
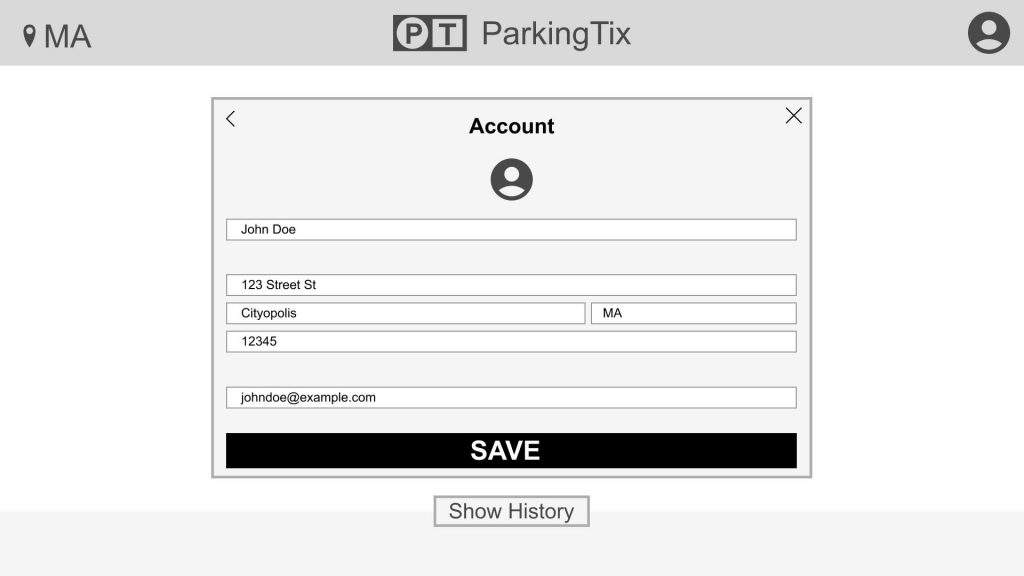
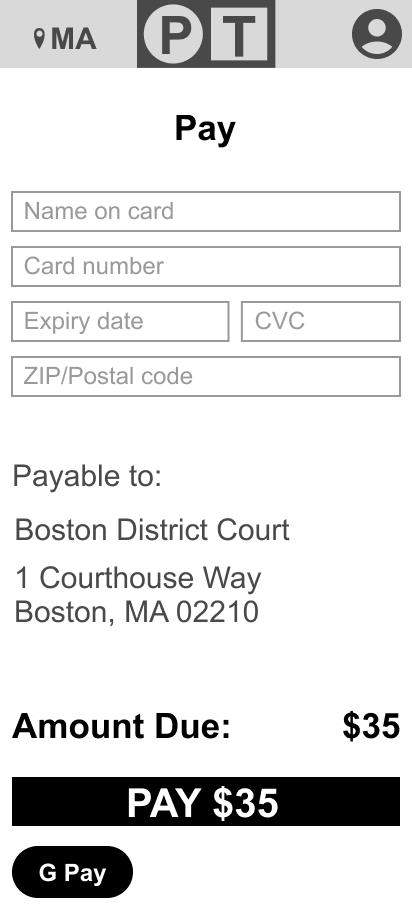
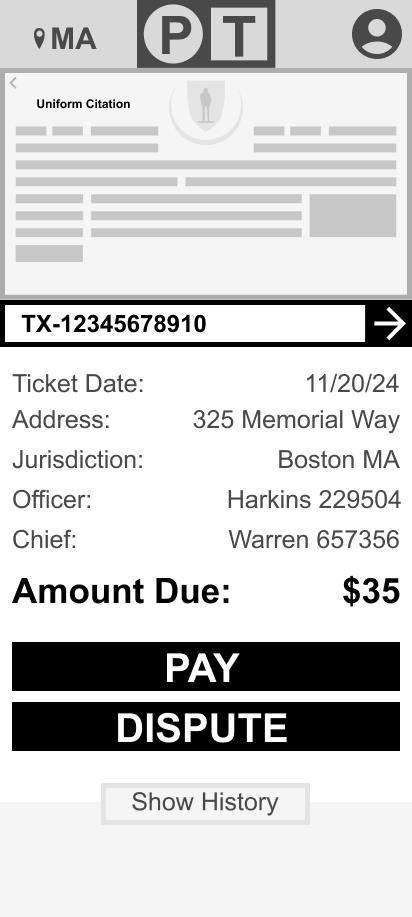
After creating the mockups for ParkingTix for web, I built high-fidelity (hi-fi) prototypes. These prototypes had a more polished design and better showcased the app’s functionality. The ParkingTix hi-fi prototype included features like a simulated sign-up screen and payment system.18
You can view the hi-fi prototypes or ParkingTix for web at the following links:
ParkingTix for web hi-fi prototype (desktop)
ParkingTix for web hi-fi prototype (mobile)
Test
The test phase is the fifth stage of the UX design process. In this phase, the product, typically an app or website, is tested by users who provide feedback, often through crit sessions or usability studies.19
Crit session
A “crit session” (criticism session) involves presenting a prototype to a tester, often a designer or engineer, who provides feedback. Crit sessions are a quick way to gather input. I did not use a crit session in the design process for ParkingTix for web.
Usability Study
A usability study tests a product with real users to gather feedback on its design and functionality. It involves multiple testers from the target user base who complete tasks and answer questions. Unlike crit sessions, participants are usually non-experts. The study is recorded, and feedback is typically documented in a spreadsheet.20
For my second UX design project, ParkingTix for web, I did not conduct a usability study, as it was not part of the project assignment. Unlike my first project, where I included usability studies with feedback from testers, this step was not included in the scope for the web version of ParkingTix.21
ParkingTix for web
I have developed a satisfactory prototype for the ParkingTix web app. While the design meets the current goals, it is not final. I plan to continue refining the design and will update this blog post with future improvements. You can view pictures of the finished version below.22


